Tag Archives: DIY

DIY: How to make your own cosmetics …

WEDNESDAY: NATURAL LIVING

This morning, I received an email from one of my best friends, Laureta, with this link to the blog: Rowdy Kittens.
Here are the directions – please note: I have not tried this yet (but the folks at rowdy kittens did – there is even a video), I was just so pumped about it, that I had to share right away.

How to Make Lip Balm

You’ll need a few ingredients:

Beeswax
Grapeseed oil (or almond oil, or olive oil, etc)

Melt equal parts beeswax and oil of your choice in a small pan over the stove. Use a small amount (maybe a few tablespoons) of wax and oil. When the mixture is completely melted, pour it into a small glass or tin container. You can optionally add vitamin E at this last step (just after pulling it from the heat). Vitamin E is a natural preservative and excellent for the skin. Let the mixture cool to room temperature and then it is ready to use.

Cosmetics are loaded with scary stuff like sodium lauryl sulfates and other known carcinogens (meaning they can cause cancer!). You can read all about the toxins in the book, The Story of Cosmetics, the ugly truth of toxics in and toxics out.” Click this link to see a short movie, which gives you a short synopsis of the book.

Check out these other posts that I have done on related subjects:

Homemade facial mask

Organic makeup

DIY: Necklace knock-off …

TUESDAY: DIY ART

(ps. since this picture, I trimmed some of the fringe. It is a bit much here.)

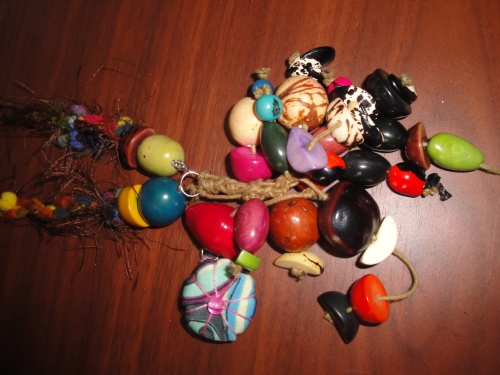
A week and a half ago, while in the Dominican Republic (check out part uno of our trip here and part dos of our trip here), my sister-in-law, Nathalie, let me wear one of her necklaces around town. I fell in love and become obsessed. No, literally – I couldn’t stop thinking about making one of my own. So, last night, after collecting the beads and string on my lunch break, I made it. It only took me three hours to do it all – paint (and dry) the beads, braid the string and thread everything together.

I’m going to make more necklaces and bracelets in the upcoming days, so I’ll show you how I paint the beads in upcoming posts. (Hint: it includes bamboo skewers and empty cracker and granola bar boxes.)

Here are pictures of Nathalie’s necklace.

Here are pictures of my necklace.

Pretty good replica, huh?

Here is what I used:
1. Two pieces of fringed trim (I bought at a speciality fabric store. For a $1 a yard)
2. Three colors of cross-stitch thread (I already owned these from a previous art project – check my bird cage art here.)
3. Wooden beads (I bought a tub full for $5.00 with a 40% coupon at Michael’s. So it came out to be $3.00)
4. Acrylic paint (Already owned.)
5. Random beads (Already owned.)

So the total for this necklace is $5.00! Sweet deal!

DIY pillow ideas …

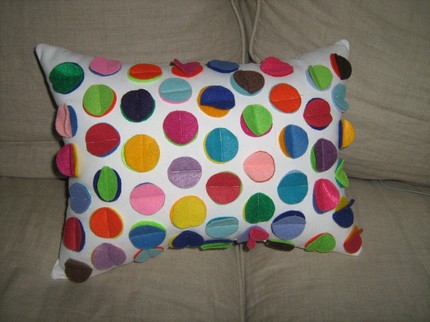
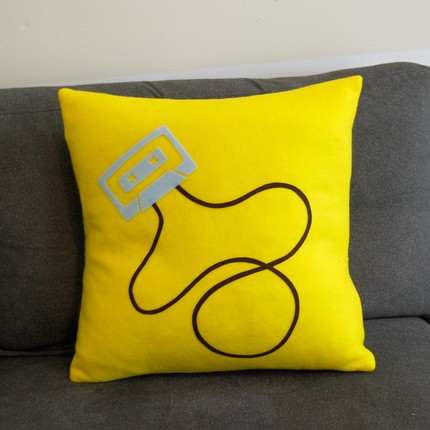
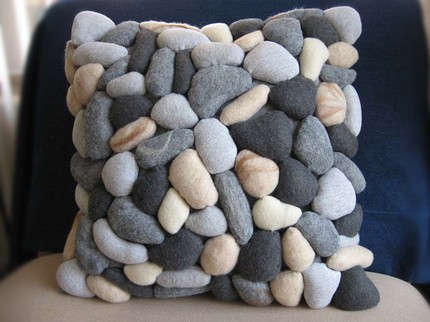
I used to be the queen of pillow making. One Christmas, I even made pillows for all of my friends. Lately, however, I haven’t had a chance to work on any. But I can daydream of designs that I’d love to copy and create. Here are some of that I found on Etsy … Okay, I’m totally inspired … I’ll work on some this week. I’m digging the multi-colored polka dot one above (but I’d do it in my room’s colors) – partly because it’s cute, partly because it’s easy. (Fingers crossed that I actually do it though! Sometimes it’s so easy for life to get in the way.)

Rock on, baby …

MONDAY: HIP MAMA

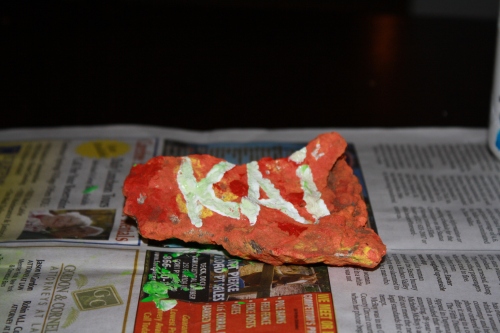
In honor of Earth day on Thursday, Kai, Alex and I painted a rock yesterday for our garden. I thought we could paint the planet or some other type of nature scene on it. Nope. Kai, being the silly little boy that he is, wanted to paint hairy feet on it. (I told you he was silly.) But, art is all about expressing yourself and I’m not about to stifle his creativity or imagination … check it our latest (albeit weird) art project.

Check out more of Kai’s art:

Gingerbread pirates

Kai’s photos

Shell streamers

So fresh and so clean, clean …

TUESDAY: DIY MOD DIGS

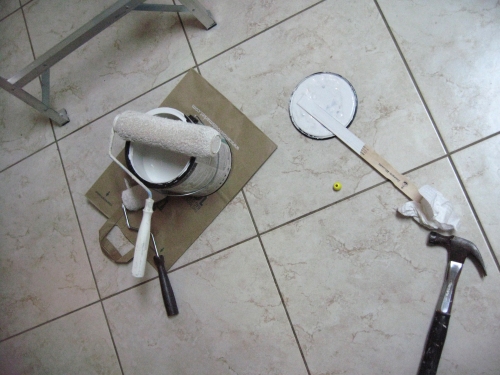
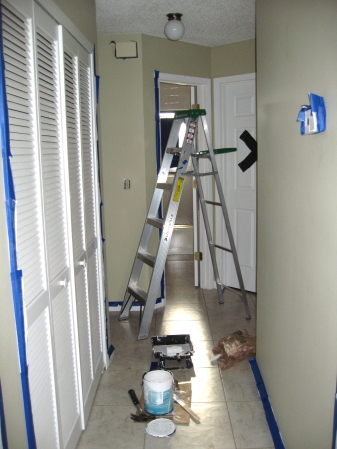
Last week, while Kai was at my parents’ house for Spring Break, I decided to paint the kitchen and back hallway – something I longed to do since we moved into the house last year.

Originally the kitchen was a muted country yellow, which didn’t mesh well with my modern tastes. I decided to go two shades lighter than my gray living room and dining rooms wall with the Sherwin Williams’ color: Edier White. Once completed, it gave the kitchen and hallway a fresh, clean look, which is hard to achieve especially when you have a mischievous three-year-old boy running around.

And a Kelly loves blog isn’t complete without the eco factor. So here it is … drum roll, please … We used zero-VOC (volatile organic compounds), water-based paint. VOCs – you know, that nasty paint, new carpet, new mattress smells – can have an adverse long term effect when it comes to the environment and human health, especially when breathed in. For about $15 more per can, we didn’t add extra chemicals to our indoor air. Love it!

Check out more of my DIY projects:
Feng Shui your bedroom

Chandelier

Shell art

Photo collage

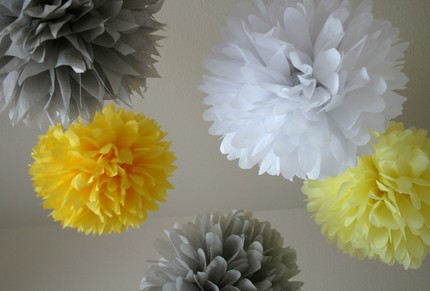
Springtime yellow + modern gray = WOW!

FRIDAY: RANDOM

See for yourself why this color combo, and my latest obsession, is so spectacular.

Check out more of my obsessions.

Free as a bird …

TUESDAY: MY ART, DIY, MOD DIGS

For almost a year before I finally had a chance to create it, I was obsessed with the idea of having a wall dedicated to three empty birdcages. I was egged on even more each time I window-shopped my local Anthropologie store. Originally, I wanted to paste birdcage decal stickers from Etsy on the wall, but I was nervous about eventually removing them and leaving a replica stain left in its place. Instead, I decided to go the cleaner and cheaper route and make them myself.

I recycled these canvases (meaning, I repainted them white) and painted the graphic birdcages on them, using the designs of the decal’s from Esty as a guide. For the chain, I nailed black ribbon for a clean straight line from the cage to the ceiling.

To complete the theme, I have seven colorful cagefree birds flittering around my guestroom. Most of the pop art birds are in flight, while a few are standing (to change it up a bit). For the birds, I scoured the web for a bird graphic that I liked and recreated it seven times on small individual white canvases. Adding to the Anthropologie-feel and to give the birds more depth and personality, I sewed funky wallpaper samples on their bellies and hand-stitched colorful thread around them.

For a HOW TO, scroll below the pictures.

Check out more of my art.

DIY: How to make your own Anthropologie-esque birdcages:

You’ll need:
1. Three larger canvases
2. Seven smaller canvases (I used a 5×5 canvas for the birds.)
3. Acrylic paint
4. Paint brushes
5. Fabric or wallpaper scraps
6. Needle and needle point thread
7. Search the web for bird and birdcage designs that inspire you
8. Pencil (and eraser)
9. Ruler

Instructions for the birdcages:
1. Paint the canvases white.
2. Print your birdcage inspirations in the largest format possible.
3. Use a ruler and a pencil to sketch the designs on the canvas. (Go slow with this part, making sure everything is even and symmetrical.)
4. Paint the birdcages black.

Instructions for the birds:
1. Paint the canvases white.
2. Print your bird inspiration in the size of your canvas.
3. Cut out the graphic and trace it on the canvas.
4. Paint the birds whatever color you like.
5. Cut out the fabric or wallpaper scrap the size needed for the bird.
6. Glue it on the bird.
7. Using needlepoint thread, loosely stitch the outline of the bird and the fabric/wall paper.

Hangin’ in the backyard …

FRIDAY: RANDOM

As we searched for a house last year, a nice, big, shaded back yard was on top of my family’s requirement list. Alex and I thought it was important that Kai had a safe place to play and discover nature. I want him to feel like it’s his space, so I’ve placed fun and colorful artwork that we made together around the yard to encourage his creative exploration.

A few months ago, Kai and I invited our friend Jessica over to help us paint seashells that I once used as tablecloth weights for my wedding. (We drilled holes in them for the wedding, so they were ready to be strung.) I had been saving these shells for years (seven to be exact), knowing one day they would come in handy.

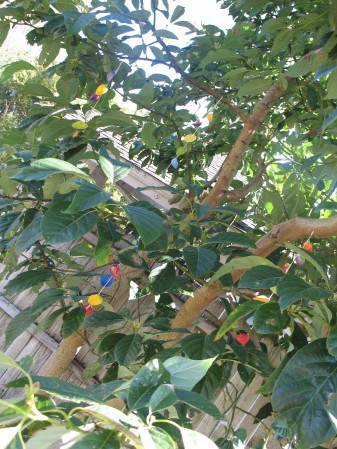
Originally I was going to string the shells along the fence, but Jess had the great idea of hanging them from the limbs of a tree. I love that if you look at the avocado tree just right, you’ll see a surprise splash of color peeking through the large leaves.

What do you think?

DIY.

What you need:

1. Seashells
2. Acrylic paint
3. String
4. Dremel drill
5. Tree

Instructions:

1. Use a dremel drill to cut holes into the shell.
2. Paint the shells in an array of colors and designs.
3. Hang about seven or eight on a string.
4. Tie them onto a tree branch.

It’s that easy!

Check out more of our back yard art and our veggie garden.

Yo ho, yo ho (and a rum and Diet Coke for Mommy) …

MONDAY: HIP MAMA

It’s a pirate’s life for Kai – from his birthday cake to his weekly sword fights with his grandpa. To help feed his buccaneer mania, we made little pirate puppets recently to mimic the little pirate gingerbread men in Kai’s favorite book, The Gingerbread Pirates, by Kristen Kladstrup (ps. When you have a three-year-old a book’s seasonality doesn’t matter.)

We used toothpicks for peg legs, popsicle sticks as the swords, pipe cleaners for the hooks and googley eyes for, well, the eyes. Kai had a blast making these, except when he realized he couldn’t eat them.

How to make gingerbread pirate puppets:

You’ll need:
construction paper
toothpicks
popsicle sticks
pipe cleaners
googley eyes
glue
gingerbread man cookie cutter
hole puncher
pirate flag (optional)

Instructions:
1. Trace your gingerbread man cookie cutter.
2. Cut him out.
3. Decorate: tape toothpicks on the back for peg legs, paste hole-punched circles, cut out little shorts and belts and paste them on.

Voila! Your very own gingerbread pirate! Argh!